The Adamantine Forge from Baldur's Gate 3 is located within the walls of the Grymforge. In this guide you'll know how to enter the forge, use it and which danger awaits you at the end.

With the Grymforge in Baldur's Gate 3, we get introduced to a big, dark, rundown industrial location. The walls are crumbling, an unknown force is pervading, and Lava is spreading all over the place.
Some passageways have been cut off over time, and so we need to use platforms and levers to get around. In this guide, you will find every useful information to get by and reach the Adamantine Forge!
Before we start, here is a small tip for you: Don't be so foolish like me and split your group into two to activate a lever in the Grymforge. Just use your ranged fighter to shoot the levers!
Baldur's Gate 3: Adamantine Forge Location

- Get yourself a Starter Set for your D&D journey !
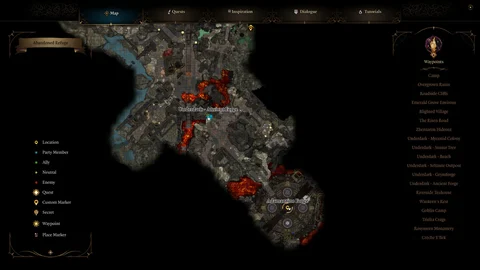
You have several ways reaching the Ancient Forge waypoint, leading you straight-forward to the Adamantine Forge. But the fastest way to getting there is as follows:
- Go north from the Grymforge area until you reach some Duergar and Deep Rothe's
- Have the spell "Speak with Animals" or "Animal Handling" ready (using a potion is also fine) and team up with the Rothe and fight the Duergar
- After the fight convince the Deep Rothe to clear the rubble before you
- Follow the path and have some Traps Disarm Toolkits on you, as you need several as the next section is full of pesky and harming traps
- Reach the ladder on your left, climb down and jump across the floating platform to the next straightforward pathway before you (you don't need to activate the levers for this one)
- Grab the Longsword mold on the ground, as you will need it at the Forge
- Reach the end of the pathway and by pressing Left ALT (right stick on controller) you'll see some levers to the left of you.
- First activate the lever on the right, hop on the floating platform, then activate the left lever (You can use ranged spells or your bow to activate it).
- Jump from the platform, move forward and drop to the lower ground and the Adamantine Forge waypoint.
- From the waypoint, you need to walk straight south-east to reach the long staircase.
Baldur's Gate 3: Activate The Forge

In order to start up the Forge, you'll need some specific materials. First, get a mold chamber - any kind works, and you'll find various types around the area as you explore. You'll also need some Mithril Ore. Since you already grabbed the longsword mold on your way here, the Mithril Ore is all that's left.
When you have what you need, put the mold chamber in the "Mould Ejection" slot and the Mithril ore on the round pedestal next to it. Lastly, pull the Forge Lever. But, before you do that, be ready because a really tough boss battle is coming up.
Seriously, I'm not even joking. The boss might be a couple levels higher than you, stay sharp!
Baldur's Gate 3: How To Beat The Boss Grym

The fight is a challenging one as you're probably around level 5 or 6 as you reach the Forge and the construct Grym is level 8 with 300 HP. But don't worry, there's a little trick and mechanic to this fight, that makes everything a lot easier!
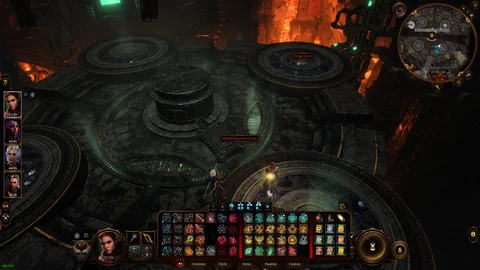
- Ungroup your party and position each character on a different round platform from the forge;
- It's mandatory to have one character at the lava valve and the forge lever – the forge lever can also be triggered by a ranged attack, so don't bother standing right next to it;
- Your main goal is to pull Grym to the center of the forge. This works splendidly, as the boss always targets the last character that attacked it last. Making maneuvering him a lot easier;
- Once Grym is near the middle platform, activate the forge lever to drop a huge piston onto it;
- As you maneuver him around and keep the lava flowing by using the valve, make sure he steps on the lava. If you don't do it, Grym will be otherwise resistant against every type of damage, making him impossible to beat.
Repeat this trick several times, and you emerge victorious after a few rounds. Congratulations, you have your very first adamantine weapon at your disposal!


